本文承接VitisAI-04-PetaLinux Flow,介绍使用Xilinx的Vitis工具利用Vivado生成的design_1_wrapper.xsa文件以及PetaLinux编译的rootfs和内核镜像,生成制作好的SD卡镜像文件sd_card.img
PetaLinux工程准备编译好的各文件
PetaLinux编译成功后的输出文件在PetaLinux工程的image/linux下,进入此目录,并在其中创建pfm文件夹,并创建boot和sd_dir两个子目录,将Vitis工程需要的PetaLinux输出文件拷贝到新创建的文件夹下
1 | cd image/linux |
拷贝以下文件到pfm/boot
bl31.elf
pmufw.elf
zynqmp_fsbl.elf
u-boot.elf
system.dtb
1 | cp bl31.elf pmufw.elf zynqmp_fsbl.elf u-boot.elf system.dtb pfm/boot |
拷贝以下文件到pfm/sd_dir
boot.scr
system.dtb
1 | cp boot.scr system.dtb pfm/sd_dir |
创建Vitis Platform Project
运行Vitis环境变量脚本
1 | source ~/opt/pkg/xilinx/Vitis/2021.1/settings64.sh |
在dpu_custom下创建dpu_vitis文件夹,并进入,打开vitis
1 | mkdir dpu_vitis |
此时的各项目文件夹路径关系为
1 | |--dpu_custom |
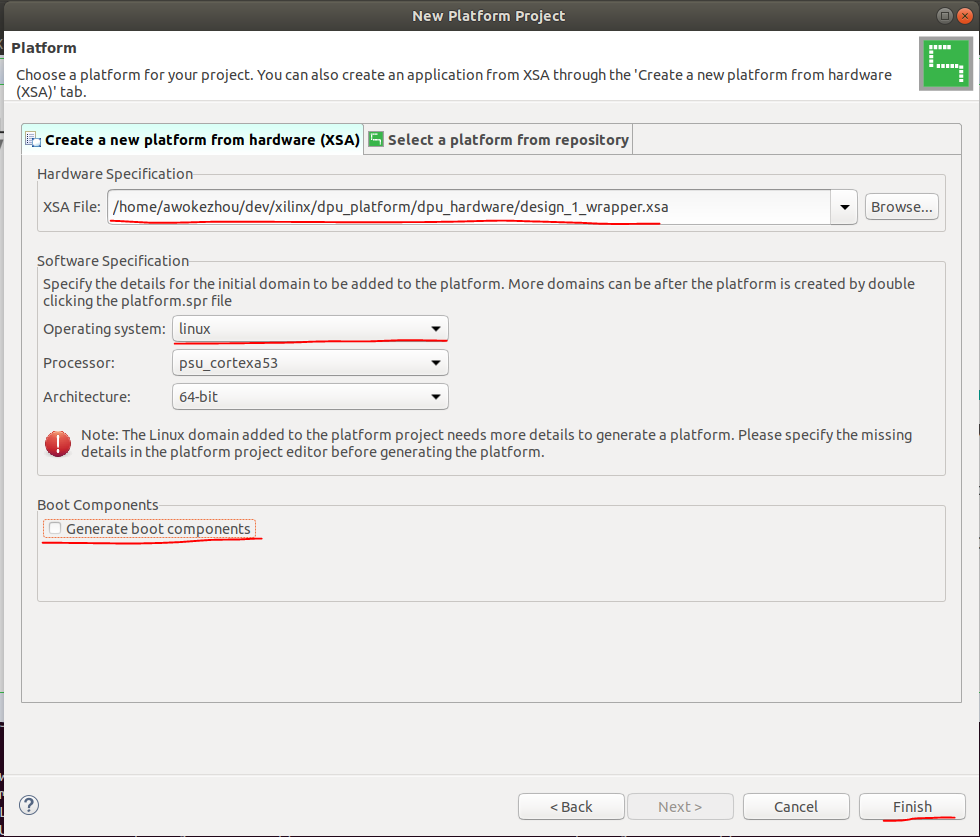
选择workspace为dpu_vitis,选择File->New->Platform Project,创建一个平台项目,设置项目名为dpu_base,点击Next,选择dpu_vivado中的.xsa硬件描述文件,Operating system选linux,取消勾选Generate boot components,点击Finish
选中linux on psu_cortexa53,在Bif File处点击下三角生成Bif File文件,Boot Components Directory选择PetaLinux项目中创建的pfm/boot,FAT32 Partition Directory选择pfm/sd_dir
右键工程编译工程,该编译过程很快(1分钟以内)
Vitis安装Vitis AI
克隆Vitis AI仓库到本地
在Vitis中添加DPU需要预先将Vitis AI仓库克隆到本地,使用如下命令
1 | git clone https://github.com/Xilinx/Vitis-AI |
安装Vitis AI到Vitis
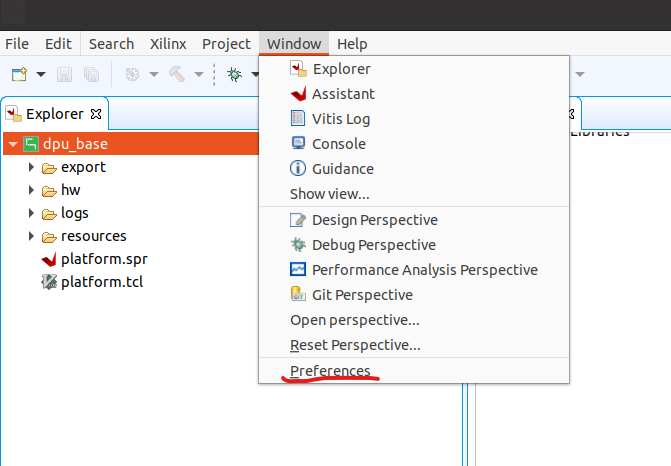
在Vitis中选择Windows→Preferences
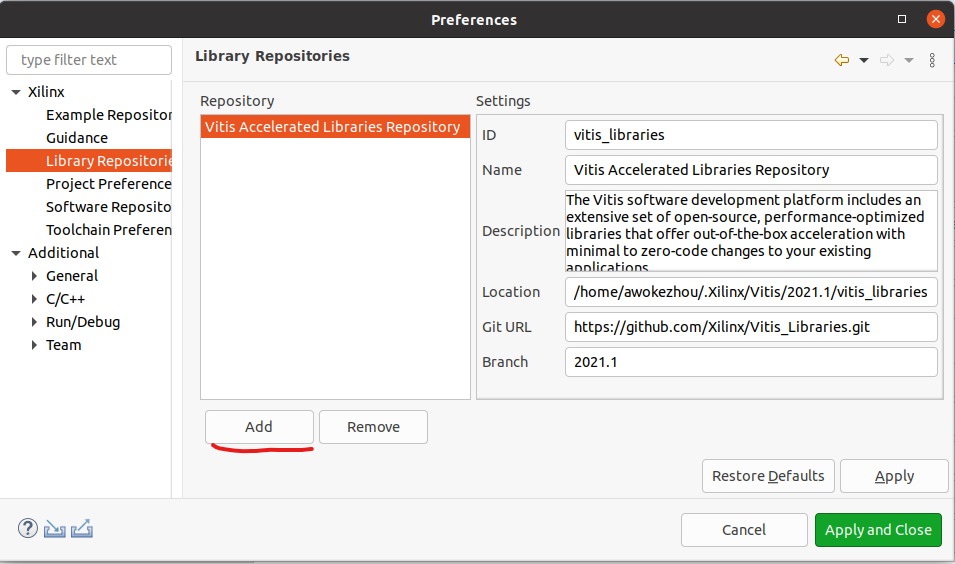
点击Add添加一个库
ID设置为vitis ai,Name设置为Vitis AI,Location设置为Vitis AI仓库路径
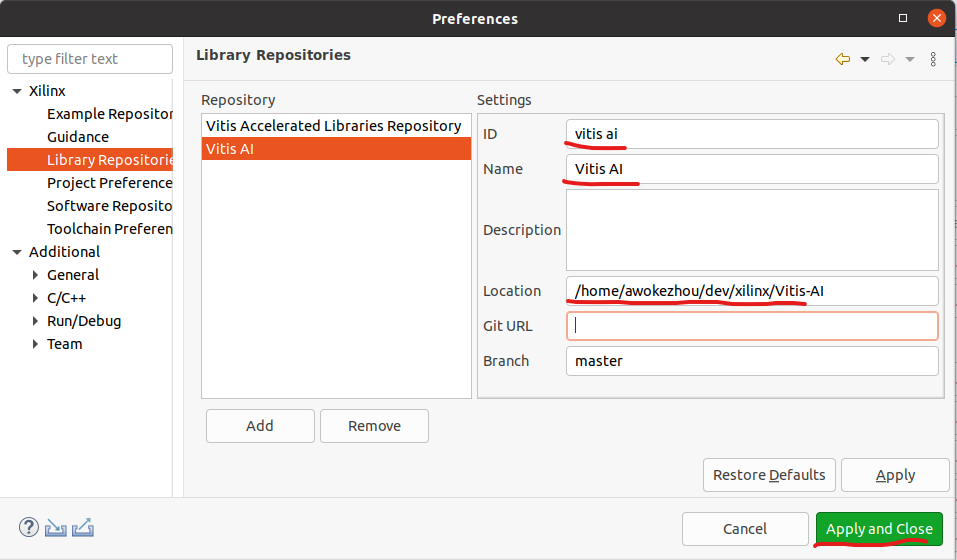
点击Apply and Close
安装交叉编译环境sdk
点击sdk-2021.2.0.0.sh下载该sdk,运行以下命令,将其安装到PetaLinux路径下
1 | ./sdk-2021.2.0.0.sh |
安装完成后PetaLinux安装路径下会出现environment-setup-cortexa72-cortexa53-xilinx-linux的文件
创建Vitis Application 工程
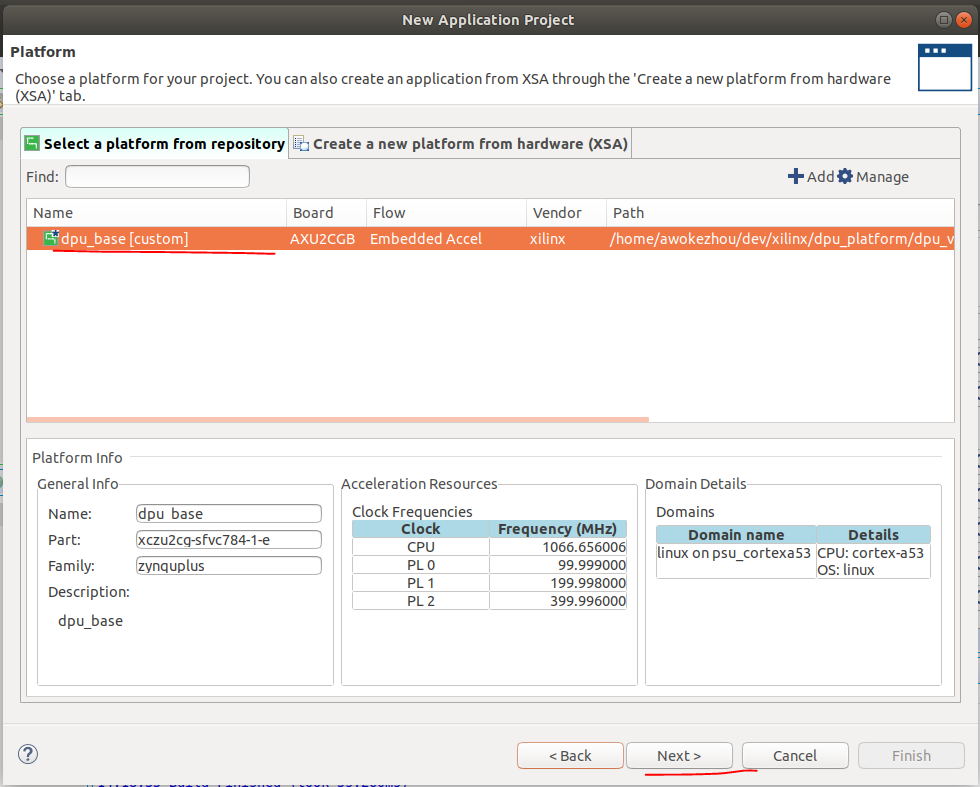
File→New→Application Project,点击Next,上文创建的platform工程自动出现在选项中,选中并点击Next
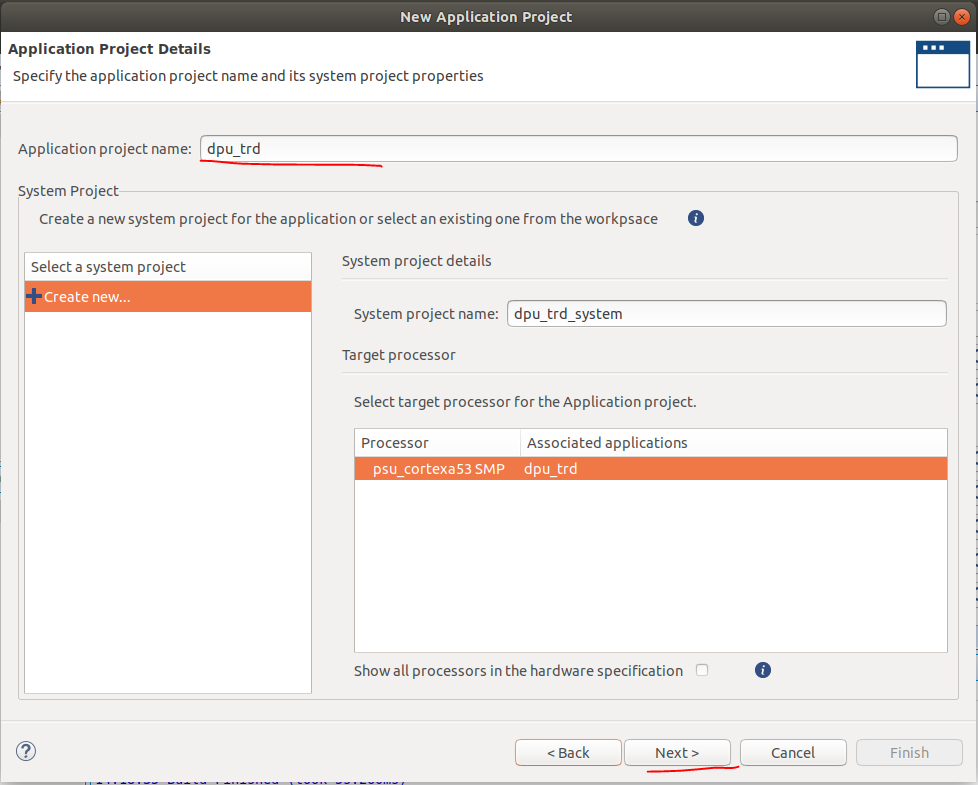
设置项目名为dpu_trd,点击Next
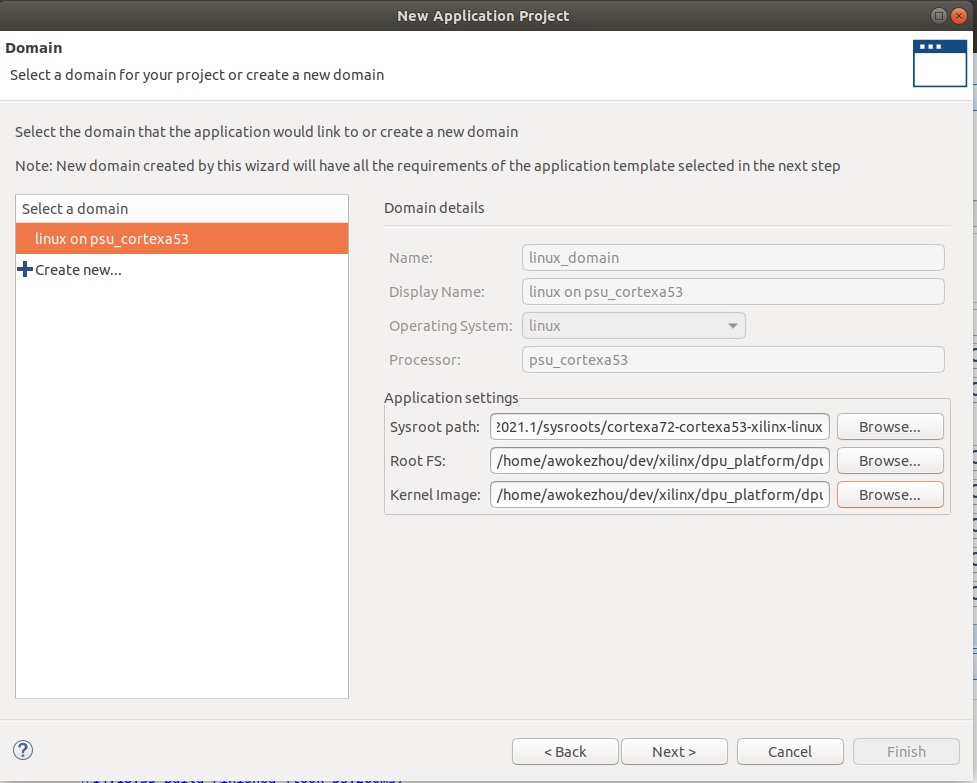
设置sysroot path为安装的交叉编译链位置:~/opt/pkg/petalinux/2021.2/sysroots/cortexa72-cortexa53-xilinx-linux,Root FS为dpu_plnx/image/linux/rootfs.ext4,Kernel Image为dpu_plnx/image/linux/image
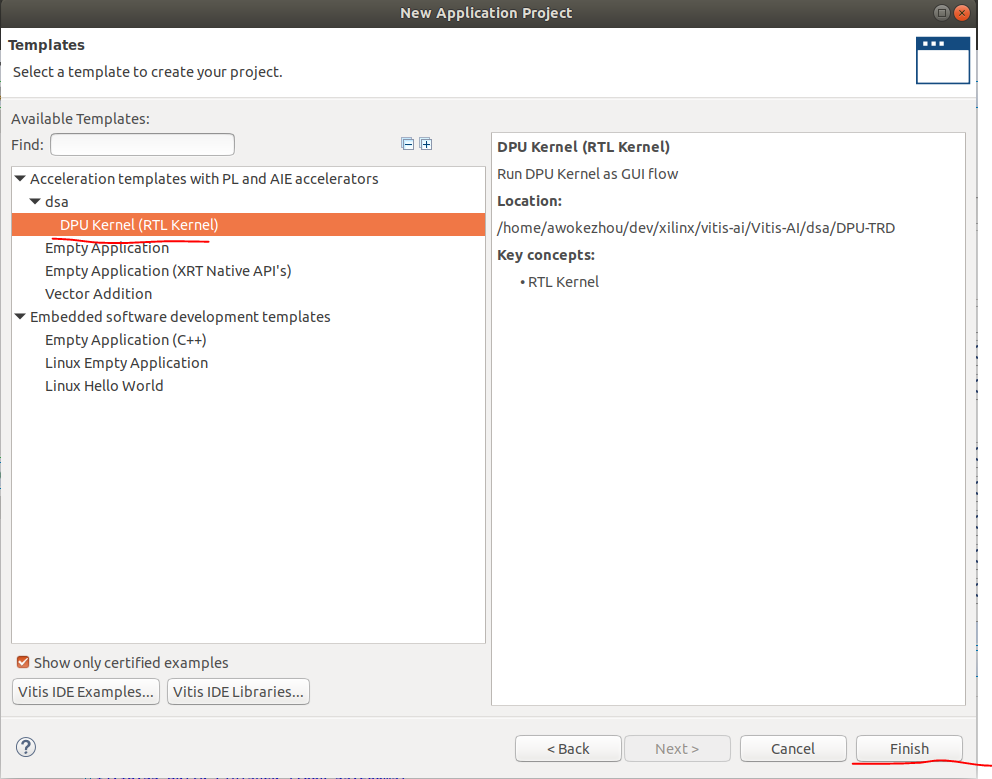
点击Next,在左侧选中dsa→DPU Kernel(RTL Kernel),点击Finish(必须在Vitis中成功安装了VitisAi仓库,这一步中才会出现DPU Kernel选项)
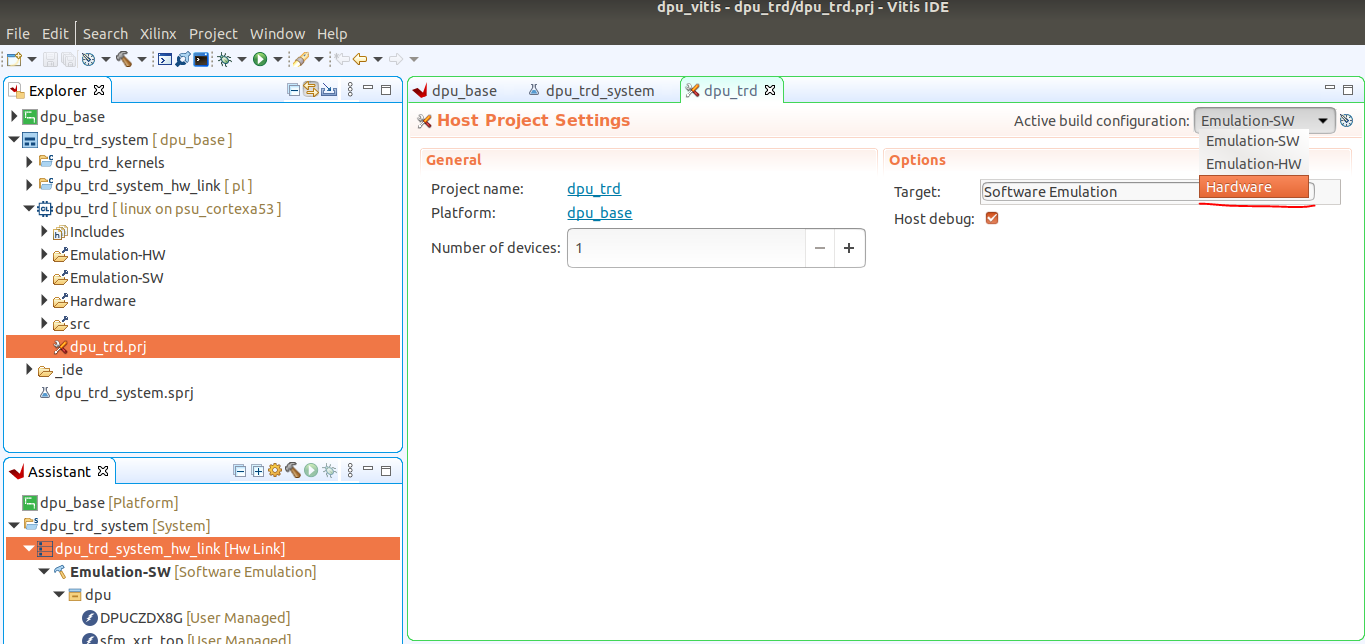
将Emulation-SW修改为Hardware
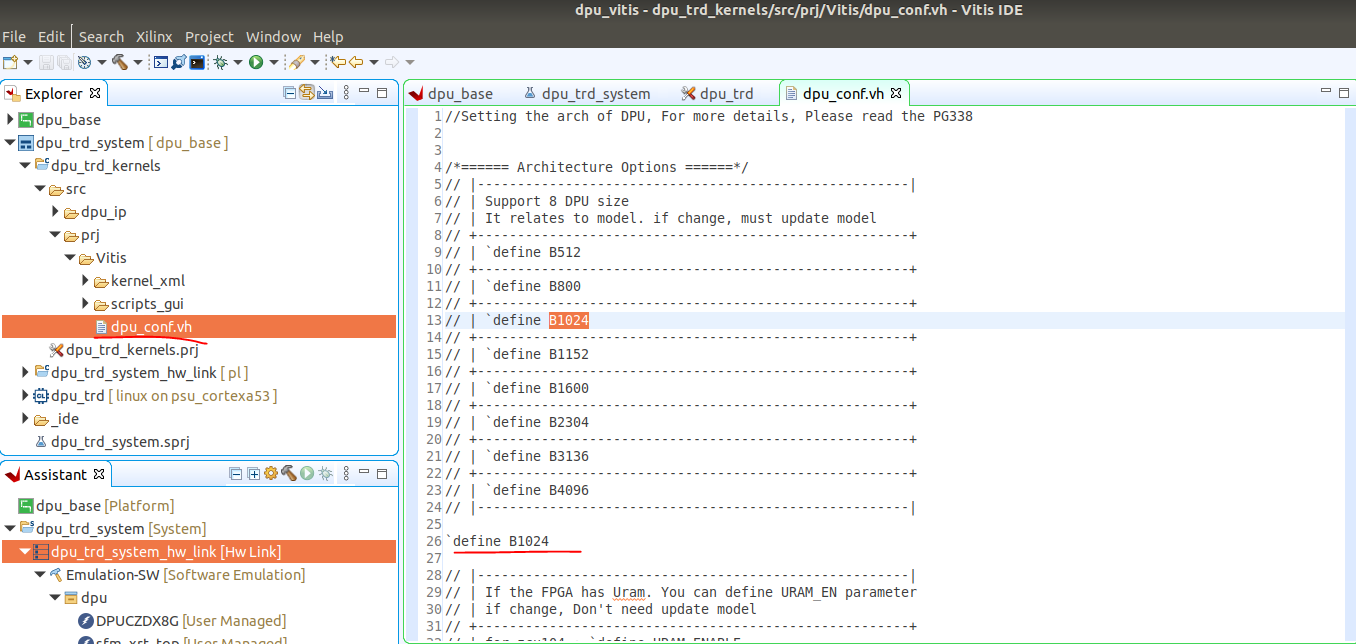
选择dpu_trd_system→dpu_trd_kernel→src→prj→Vitsi→dpi_conf.vh,将B4096改为B1024,之所以改为B1024是因为本文实验环境使用的FPGA芯片资源有限,只能选择B1024的DPU,这里的B1024和B4096是DPU不同架构配置,越大的数字代表了越高的并行度和计算性能,但同时占用更多片上资源(LUT、RAM、DSP),关于DPU相关的配置参数和资源占用,包括dpi_conf.vh文件中可选的参数含义,后续会专门出一片文章来介绍
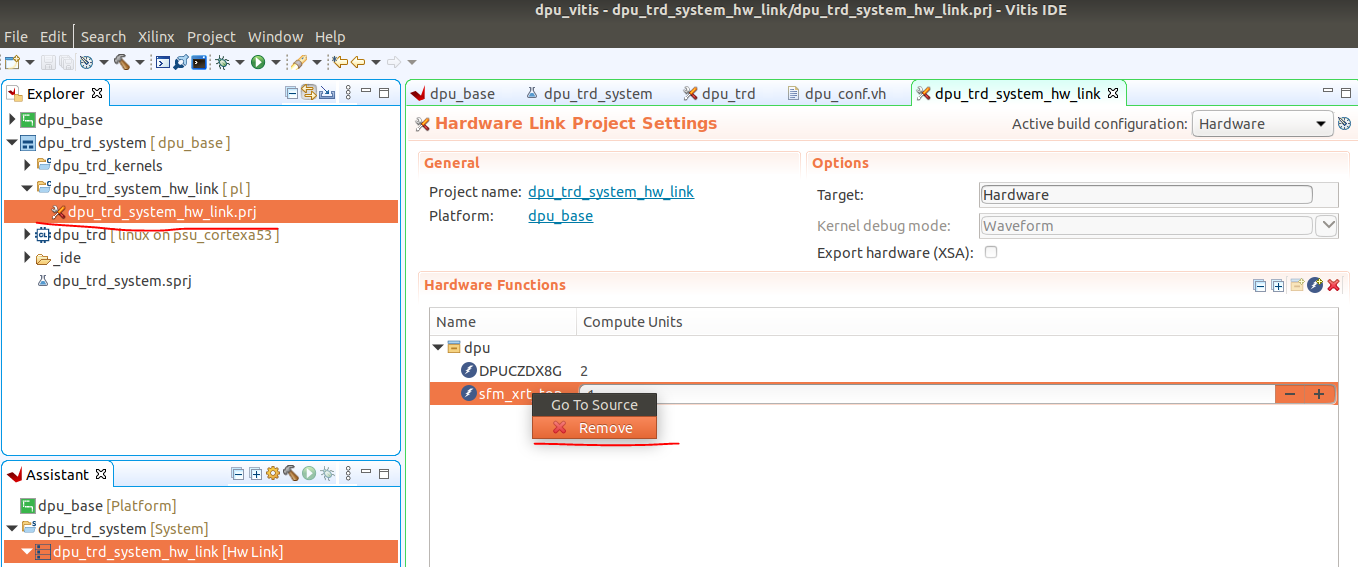
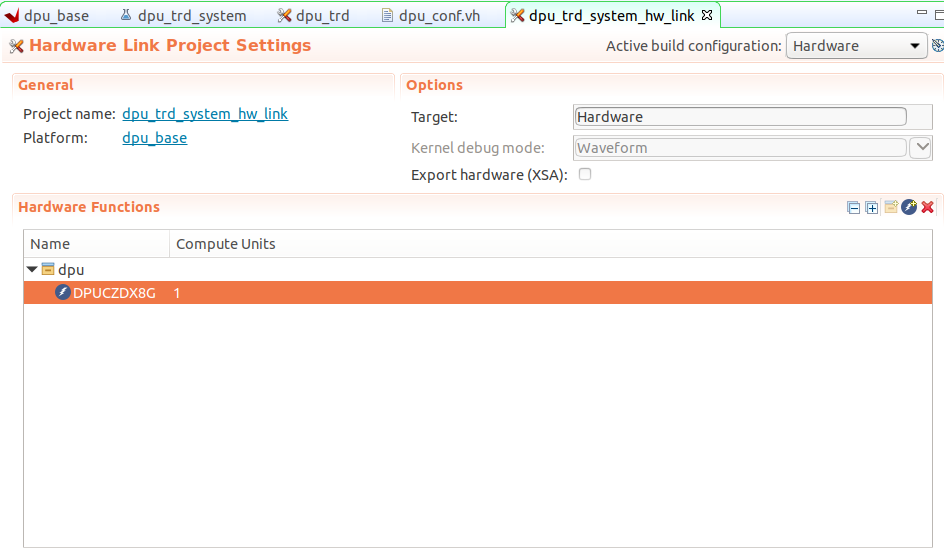
选择dpu_trd_system→dpu_trd_system_hw_link→dpu_trd_system_hw_link.prj,去除sfm_xrt_top,减少DPU数量为1(将DPU数量减小到1也是由于本文使用的FPGA资源受限)
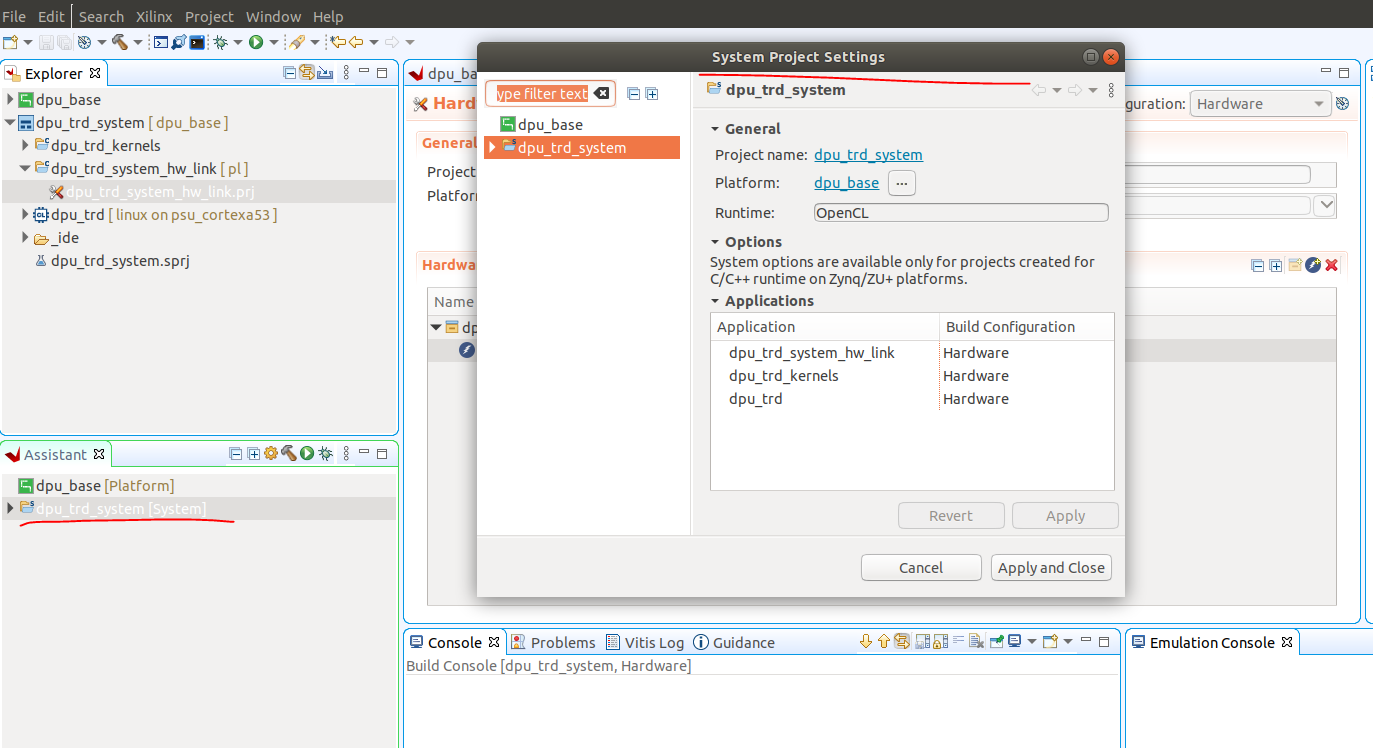
在Assistant窗口双击dpu_trd_system,弹出窗口
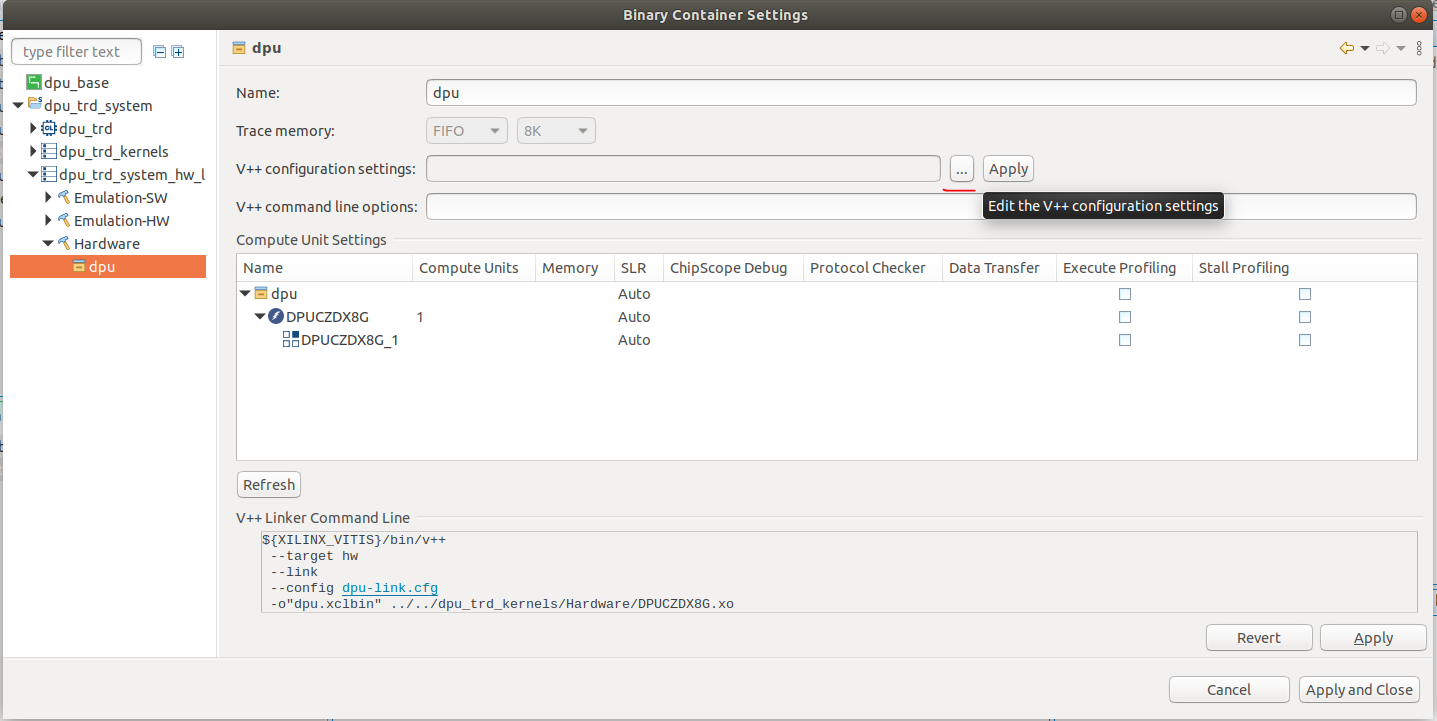
选择dpu_trd_system→dpu_trd_system_hw_link→Hardware→dpu

点击V++configuration settings的省略号按钮,为其添加时钟配置
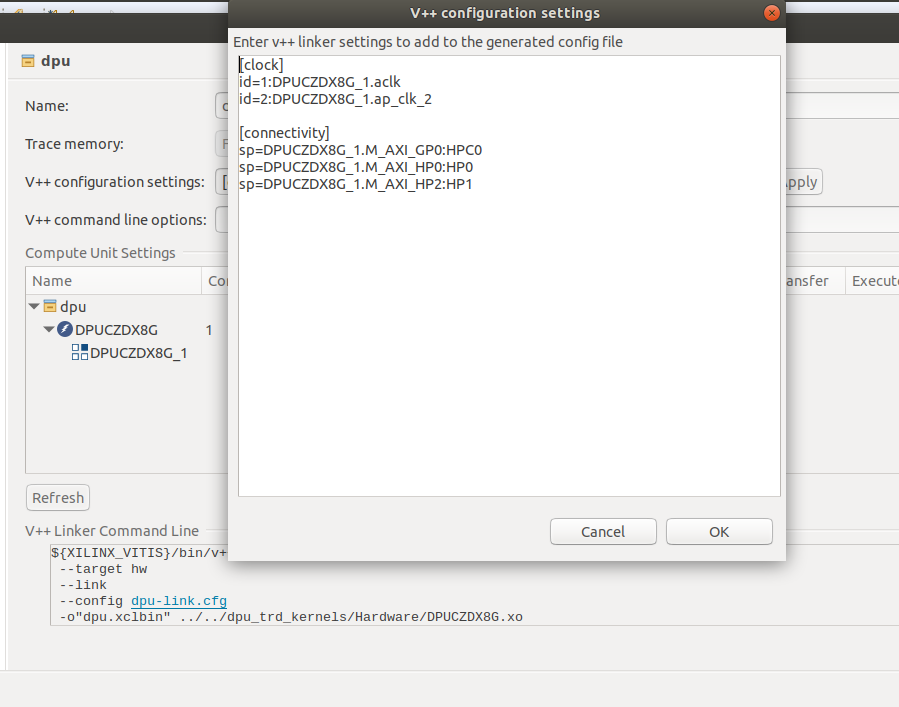
添加如下代码
1 | [clock] |
这里的时钟接口和vivado中配置的时钟一一对应
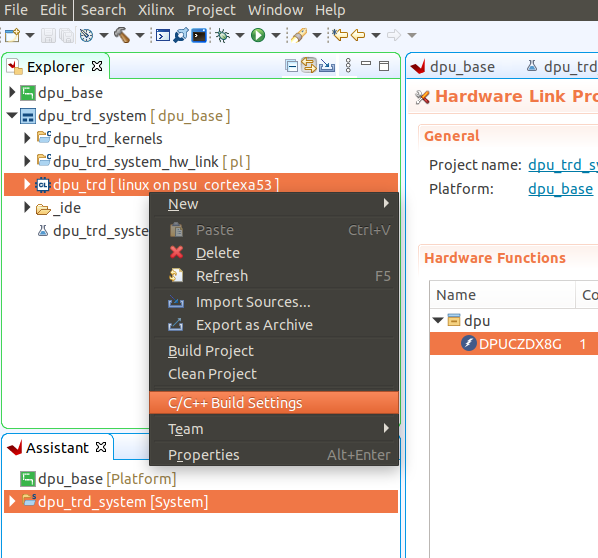
有些版本Vitis编译过程会出现找不到opencv库的error,点击Apply and Close,在dpu_trd_system→dpu_trd上右键选择C/C+= Build Settings
在includes中添加
1 | ${SYSROOT}/usr/include/opencv4 |
点击Apply
右键dpu_trd_system进行编译,该过程耗时较长,本机环境编译时长在20~30分钟。编译成功后,在vitis工程路径下的dpu_trd_system/Hardware/package路径下会生成sd_card.img
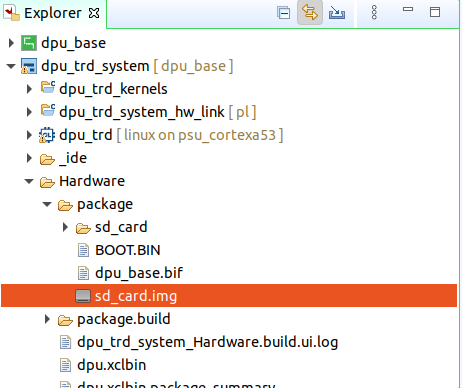
该文件是合并了linux内核镜像、uboot、dpu,xclbin二进制文件以及设备树文件的SD卡镜像文件,SD卡分区已经做好的,直接使用balenaEtcher将该文件烧写到SD卡中即可